

The Access controller for PlayStation 5 includes a built-in joystick alongside customisable buttons. It also supports compatible external joysticks that use a 3.5 mm jack connection, along with accessibility switches also with a 3.5 mm connection. It does not include USB inputs for joysticks or other peripherals.
For players needing to use a USB joystick, the HID Remapper v7 can convert USB joysticks to a 3.5 mm connection compatible with the Access controller. The device was created as part of the open source HID Remapper project by Jacek Fedoryński, which includes DIY instructions for putting your own device together. The specific device shown and referred to in this post, is a version of the device that has been made available to purchase by OneSwitch as a finished product.

The USB joysticks that we use at SpecialEffect include some of the larger joysticks with greater resistance, like the OneSwitch Zik-Zak or UltraStik (shown in the photo above), or the ultra low-force Celtic Magic Feather Joystick (XAC version) (shown in the photo below).

Some players may need to use one or more of these USB joysticks instead of those with a 3.5 mm connection that are compatible. Currently, many compatible 3.5 mm joysticks are based on a standard-sized thumbstick, similar to that found in a DualSense controller or the Access controller itself. They may also be offered by manufacturers as a version with a lighter spring, requiring less force to move them. These compatible joysticks are placed in a separate housing, allowing players more freedom to position the joystick where it is most accessible for them to use. For example, at SpecialEffect we use the Celtic Magic Mini Joystick (standard- and low-force options), OneSwitch Mini Stick (standard- and low-force options) and Evil Controllers’ Mini Thumbstick, which all have a 3.5 mm connection (shown at 1:55, here: PlayStation 5 Access controller Video | An Introductory Look).
To use the HID Remapper v7, you connect your compatible USB joystick(s) into one of the slots on the top of the device and then connect the corresponding 3.5 mm connection(s) on the side into the Access controller itself.
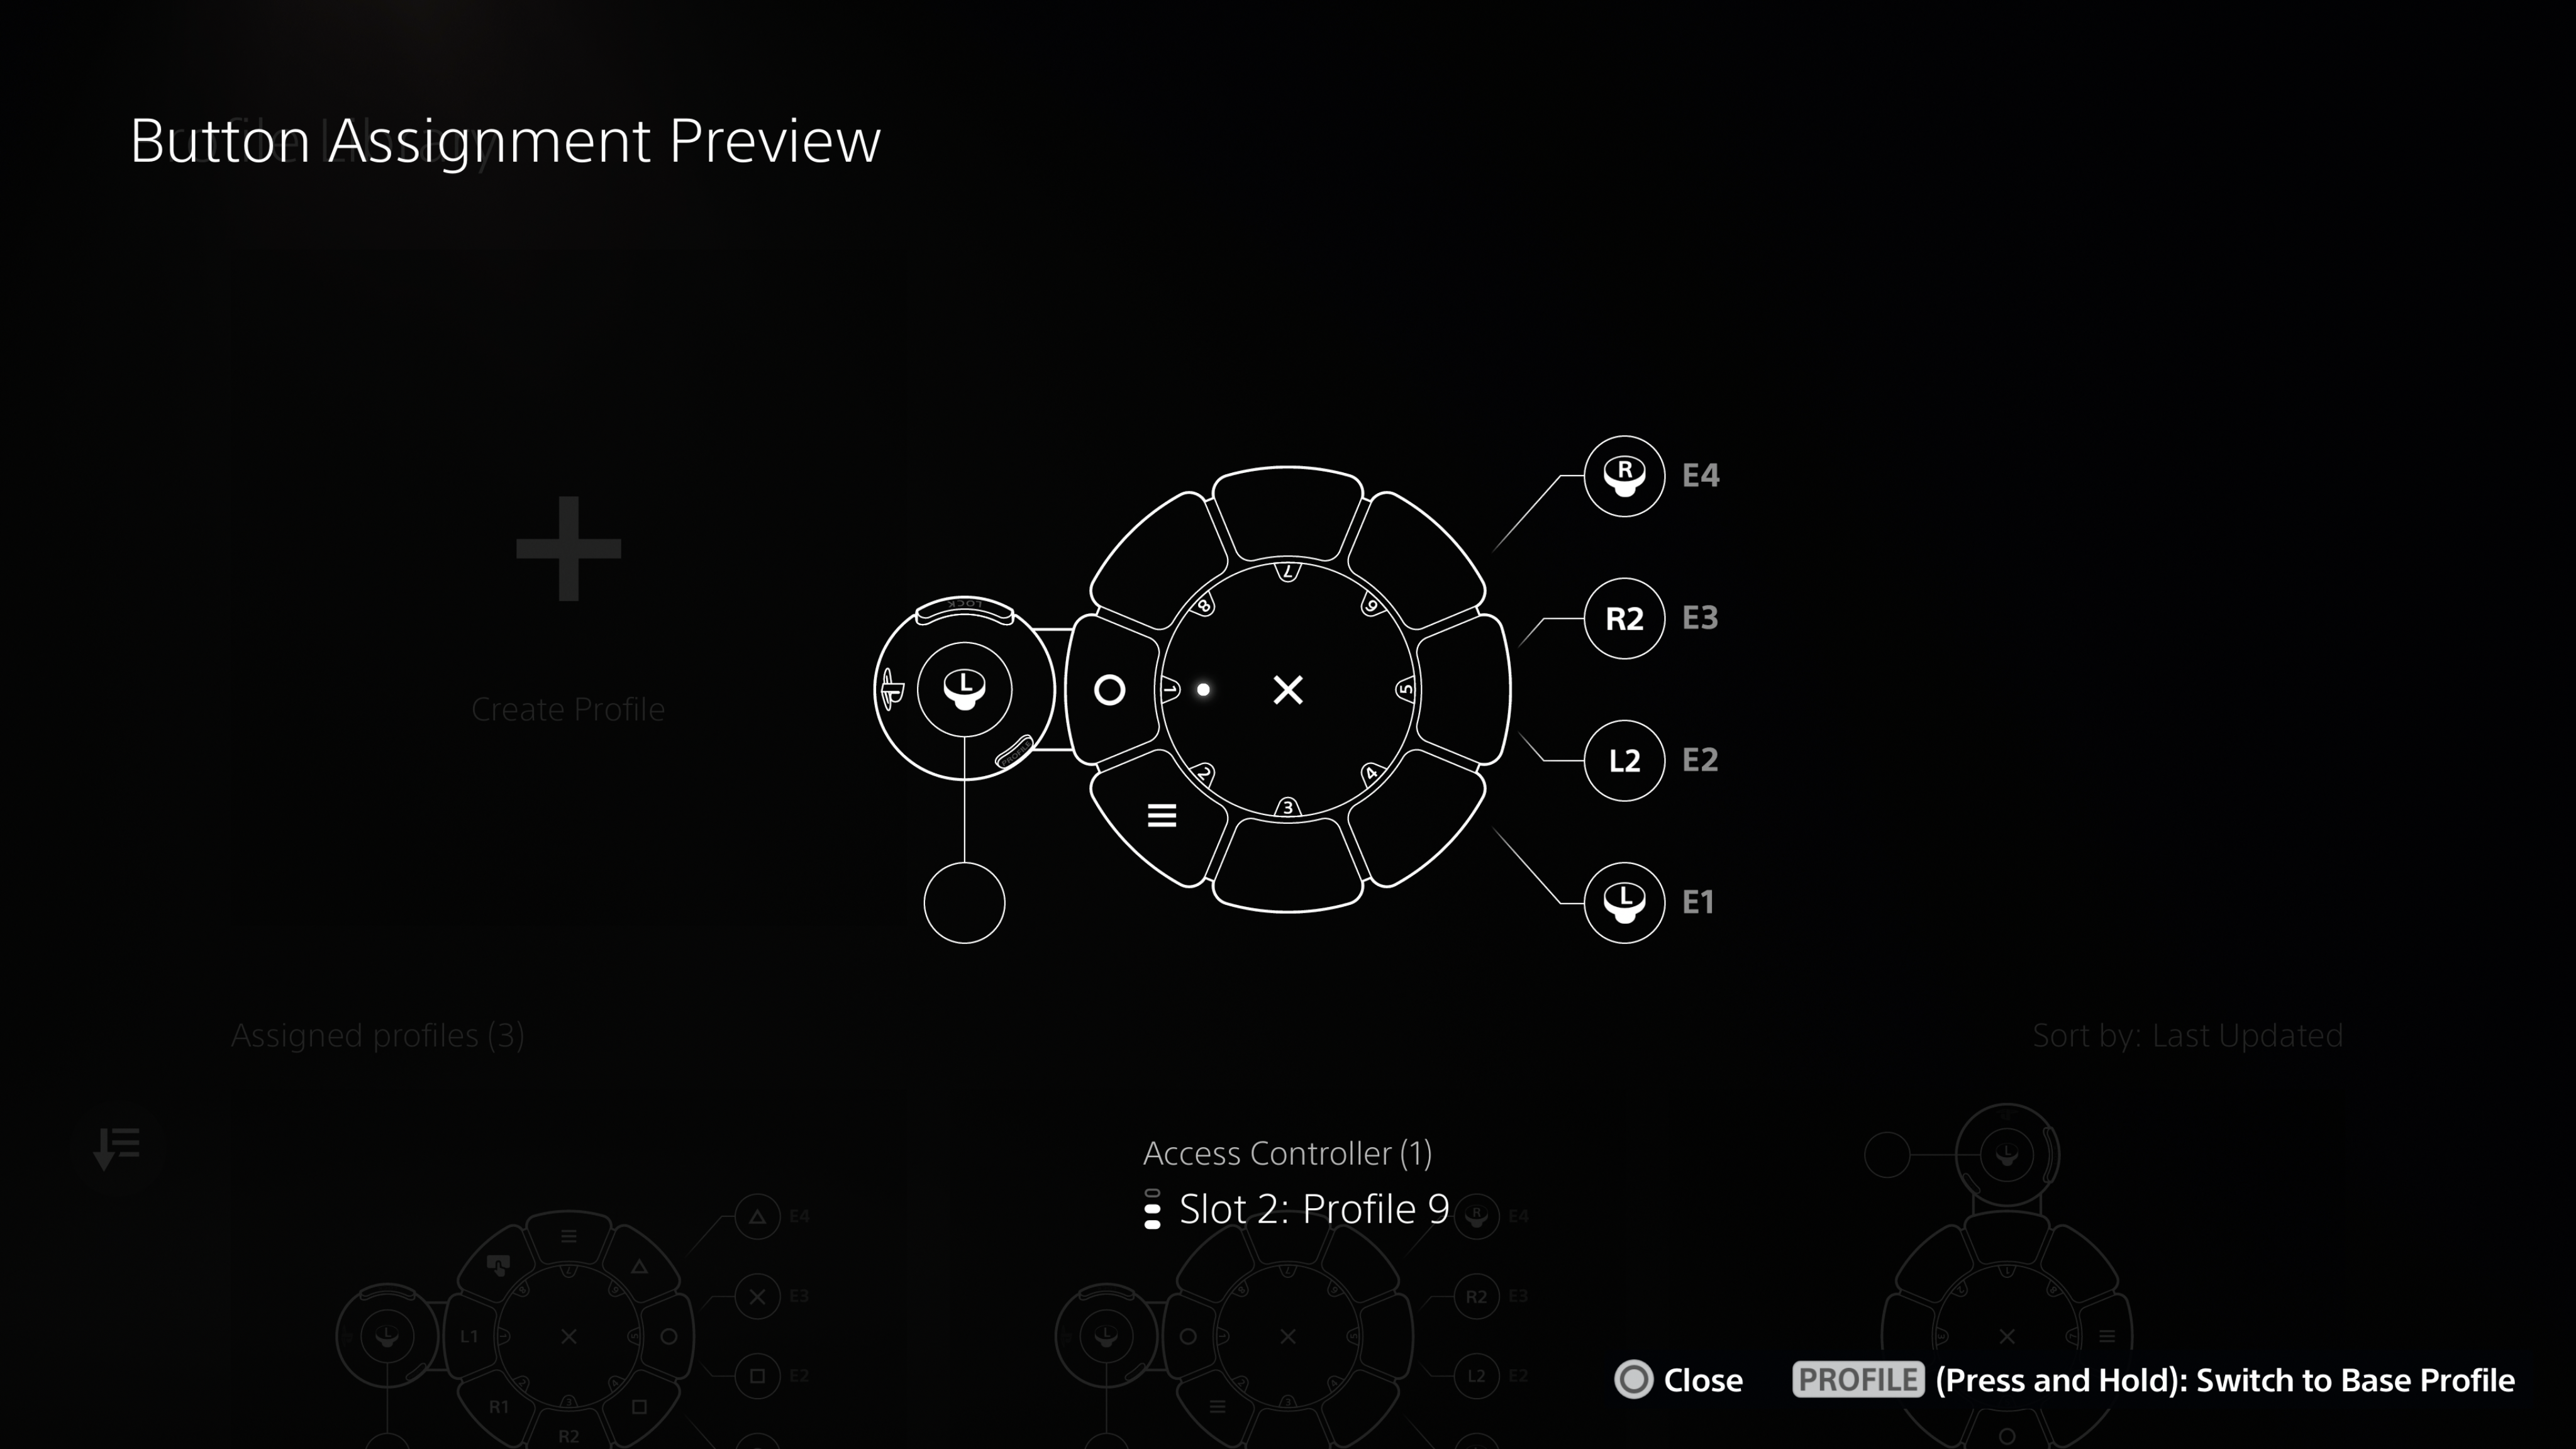
By default, the OneSwitch HID Remapper v7 allows you to connect a joystick for Left Stick (‘J1’ USB slot), Right Stick (‘J2’ USB slot) and also to use upwards movement on the stick as R2 and down as L2 (‘J3’ USB slot). You will need to map the Access controller you are connected to on your PS5 console (image of profile above). It is best to create this profile whilst the HID Remapper v7 is connected to the E1-E4 ports on the Access controller, to avoid any issues with the Access controller recognising the connected joystick(s) as an input when using the profile.

You can use this USB joystick alongside the joystick built into the Access controller for a two joystick set-up. As an example, the photo above shows a OneSwitch Zik-Zak Mini USB joystick being used as the Right Stick, alongside an Access controller. For alternate two joystick set-ups, you could also use a second USB joystick (for example, two Zik-Zaks), or a connected compatible 3.5 mm joystick. You could also pair a second Access controller and/or a DualSense controller on the PS5 console, to use the joysticks on those, too.
The Zik-Zak and Feather joysticks will work with the OneSwitch HID Remapper v7 ‘out of the box’, once the Access controller is set up correctly. An UltraStik will need the device programming using the HID Remapper configuration software and the OneSwitch UltraStik Profiles before use, or by request when ordering from OneSwitch. A video of this process can be found here: OneSwitch HID Remapper v7 | How to set up an UltraStik Profile. The USB-C slot on the side is used to power the HID Remapper v7, such as by connecting the included cable to the PS5 itself.
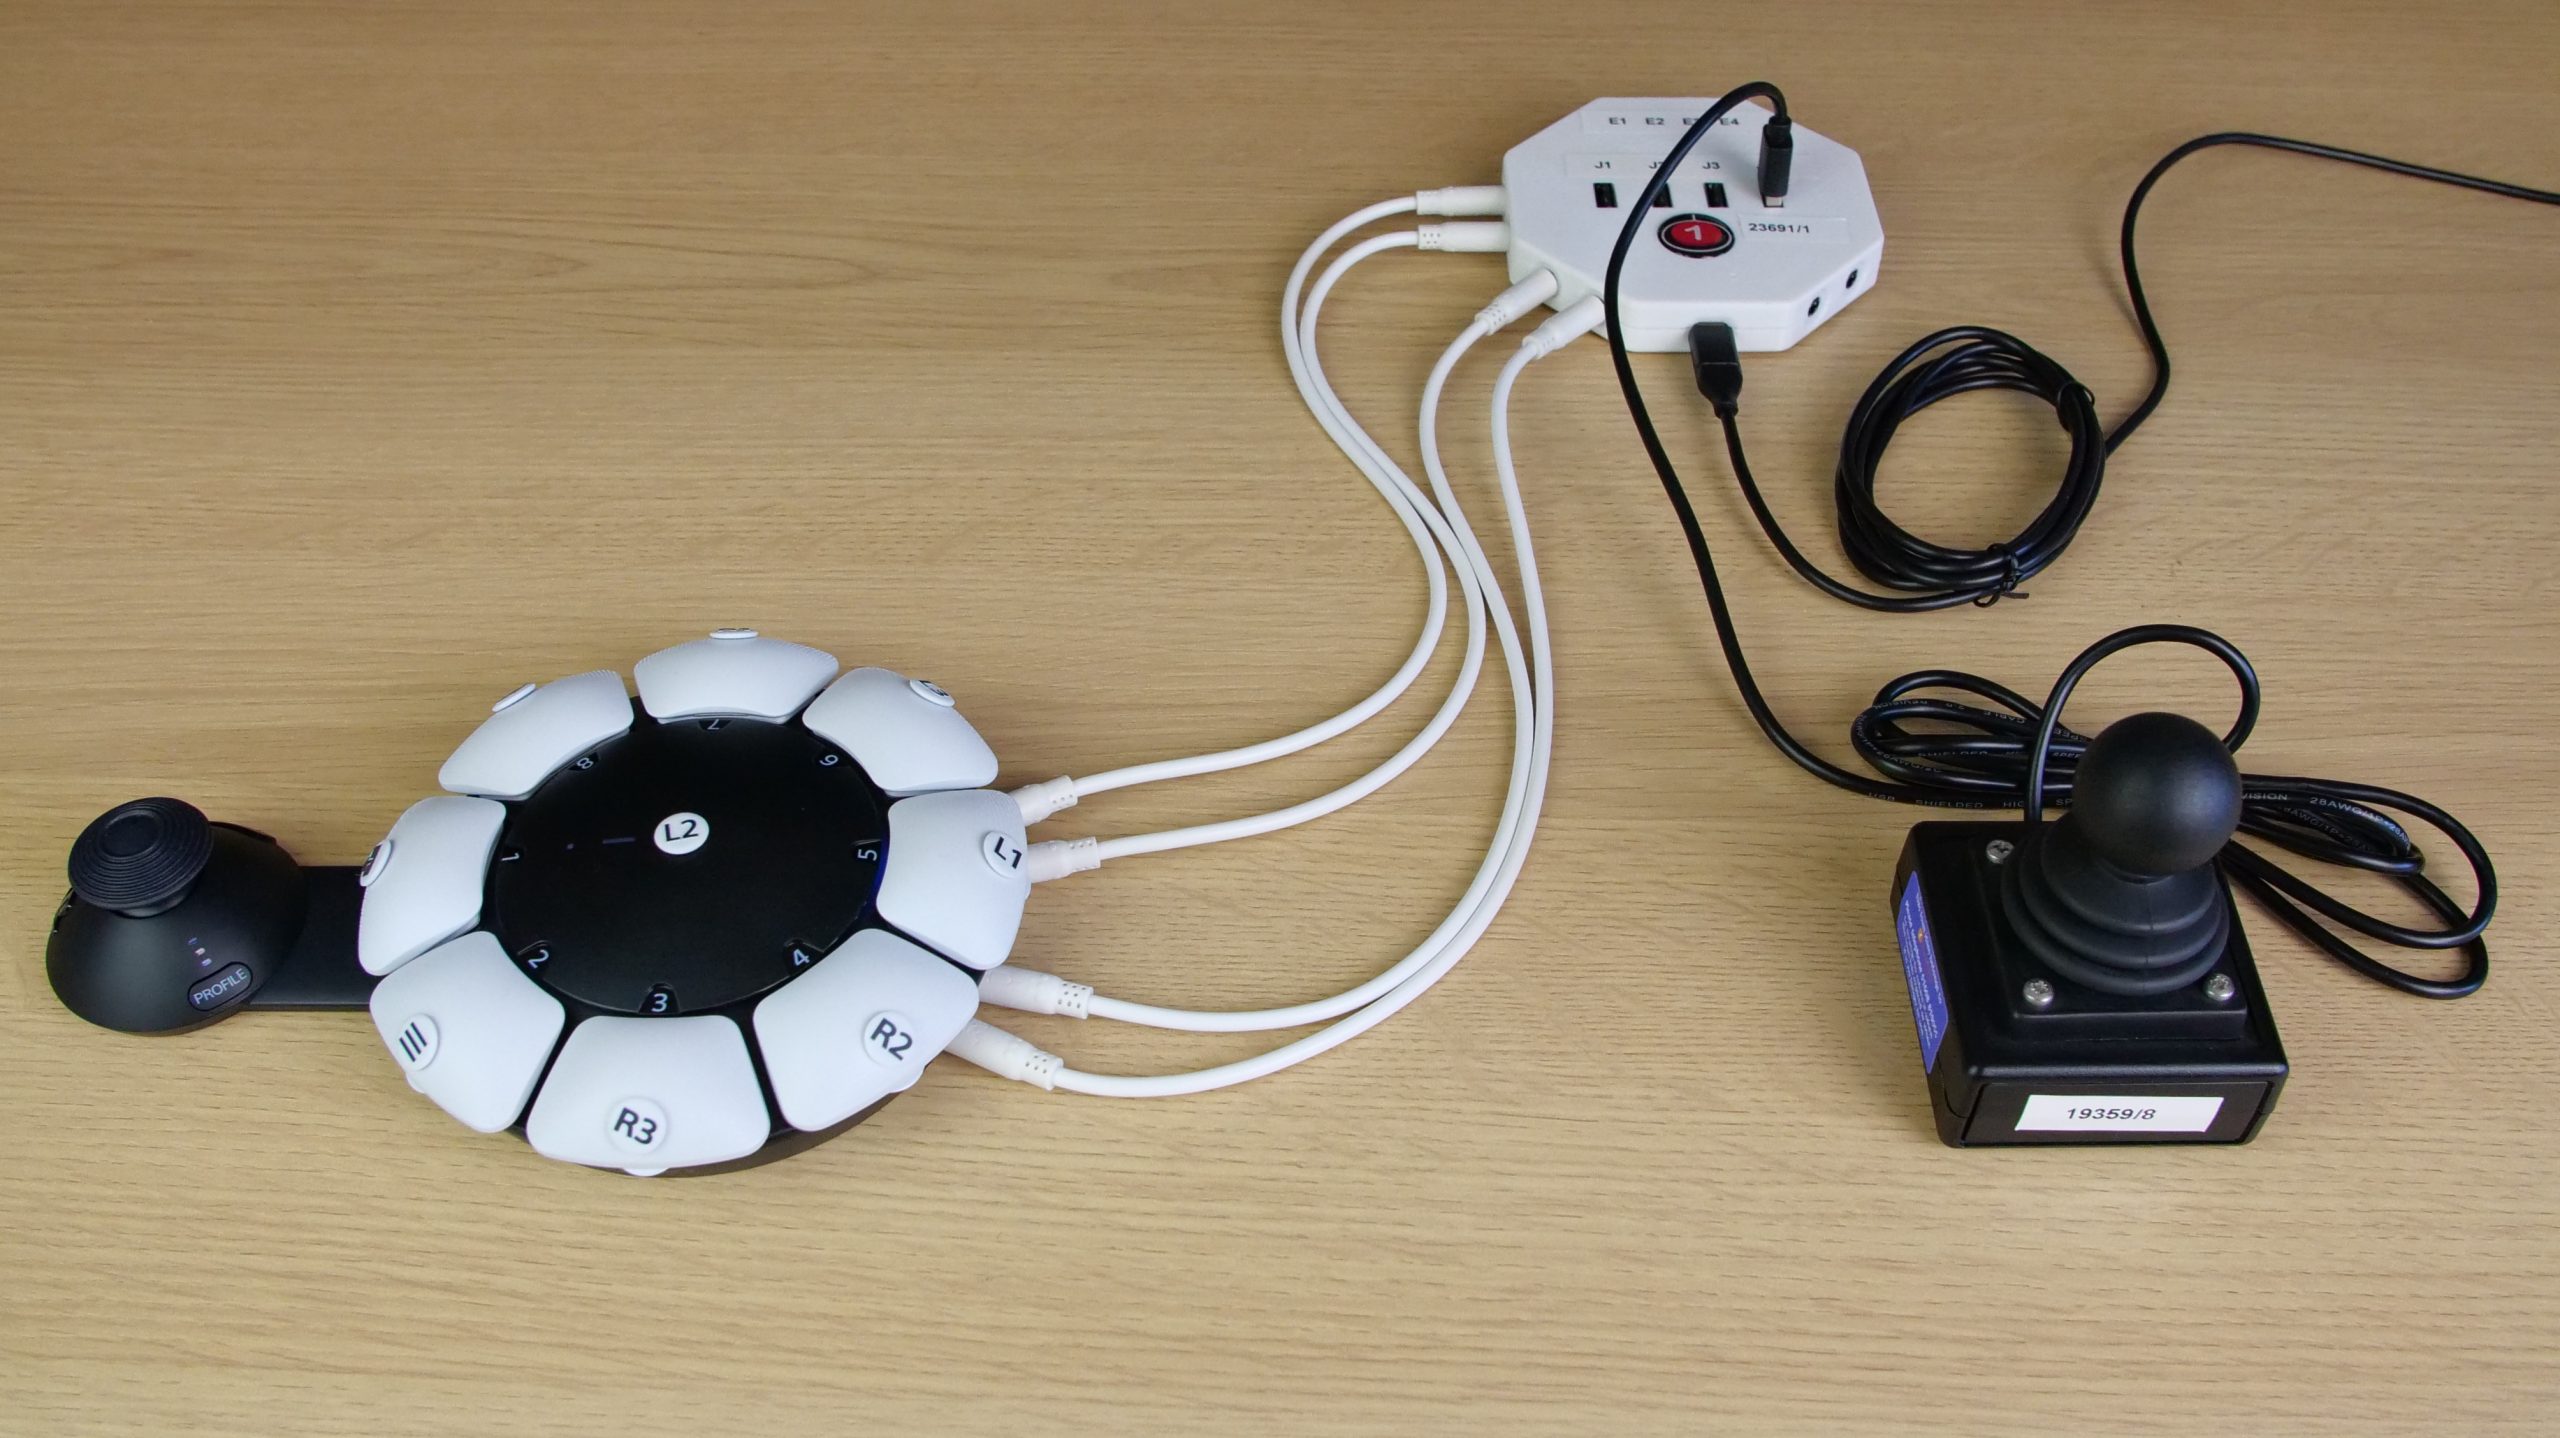
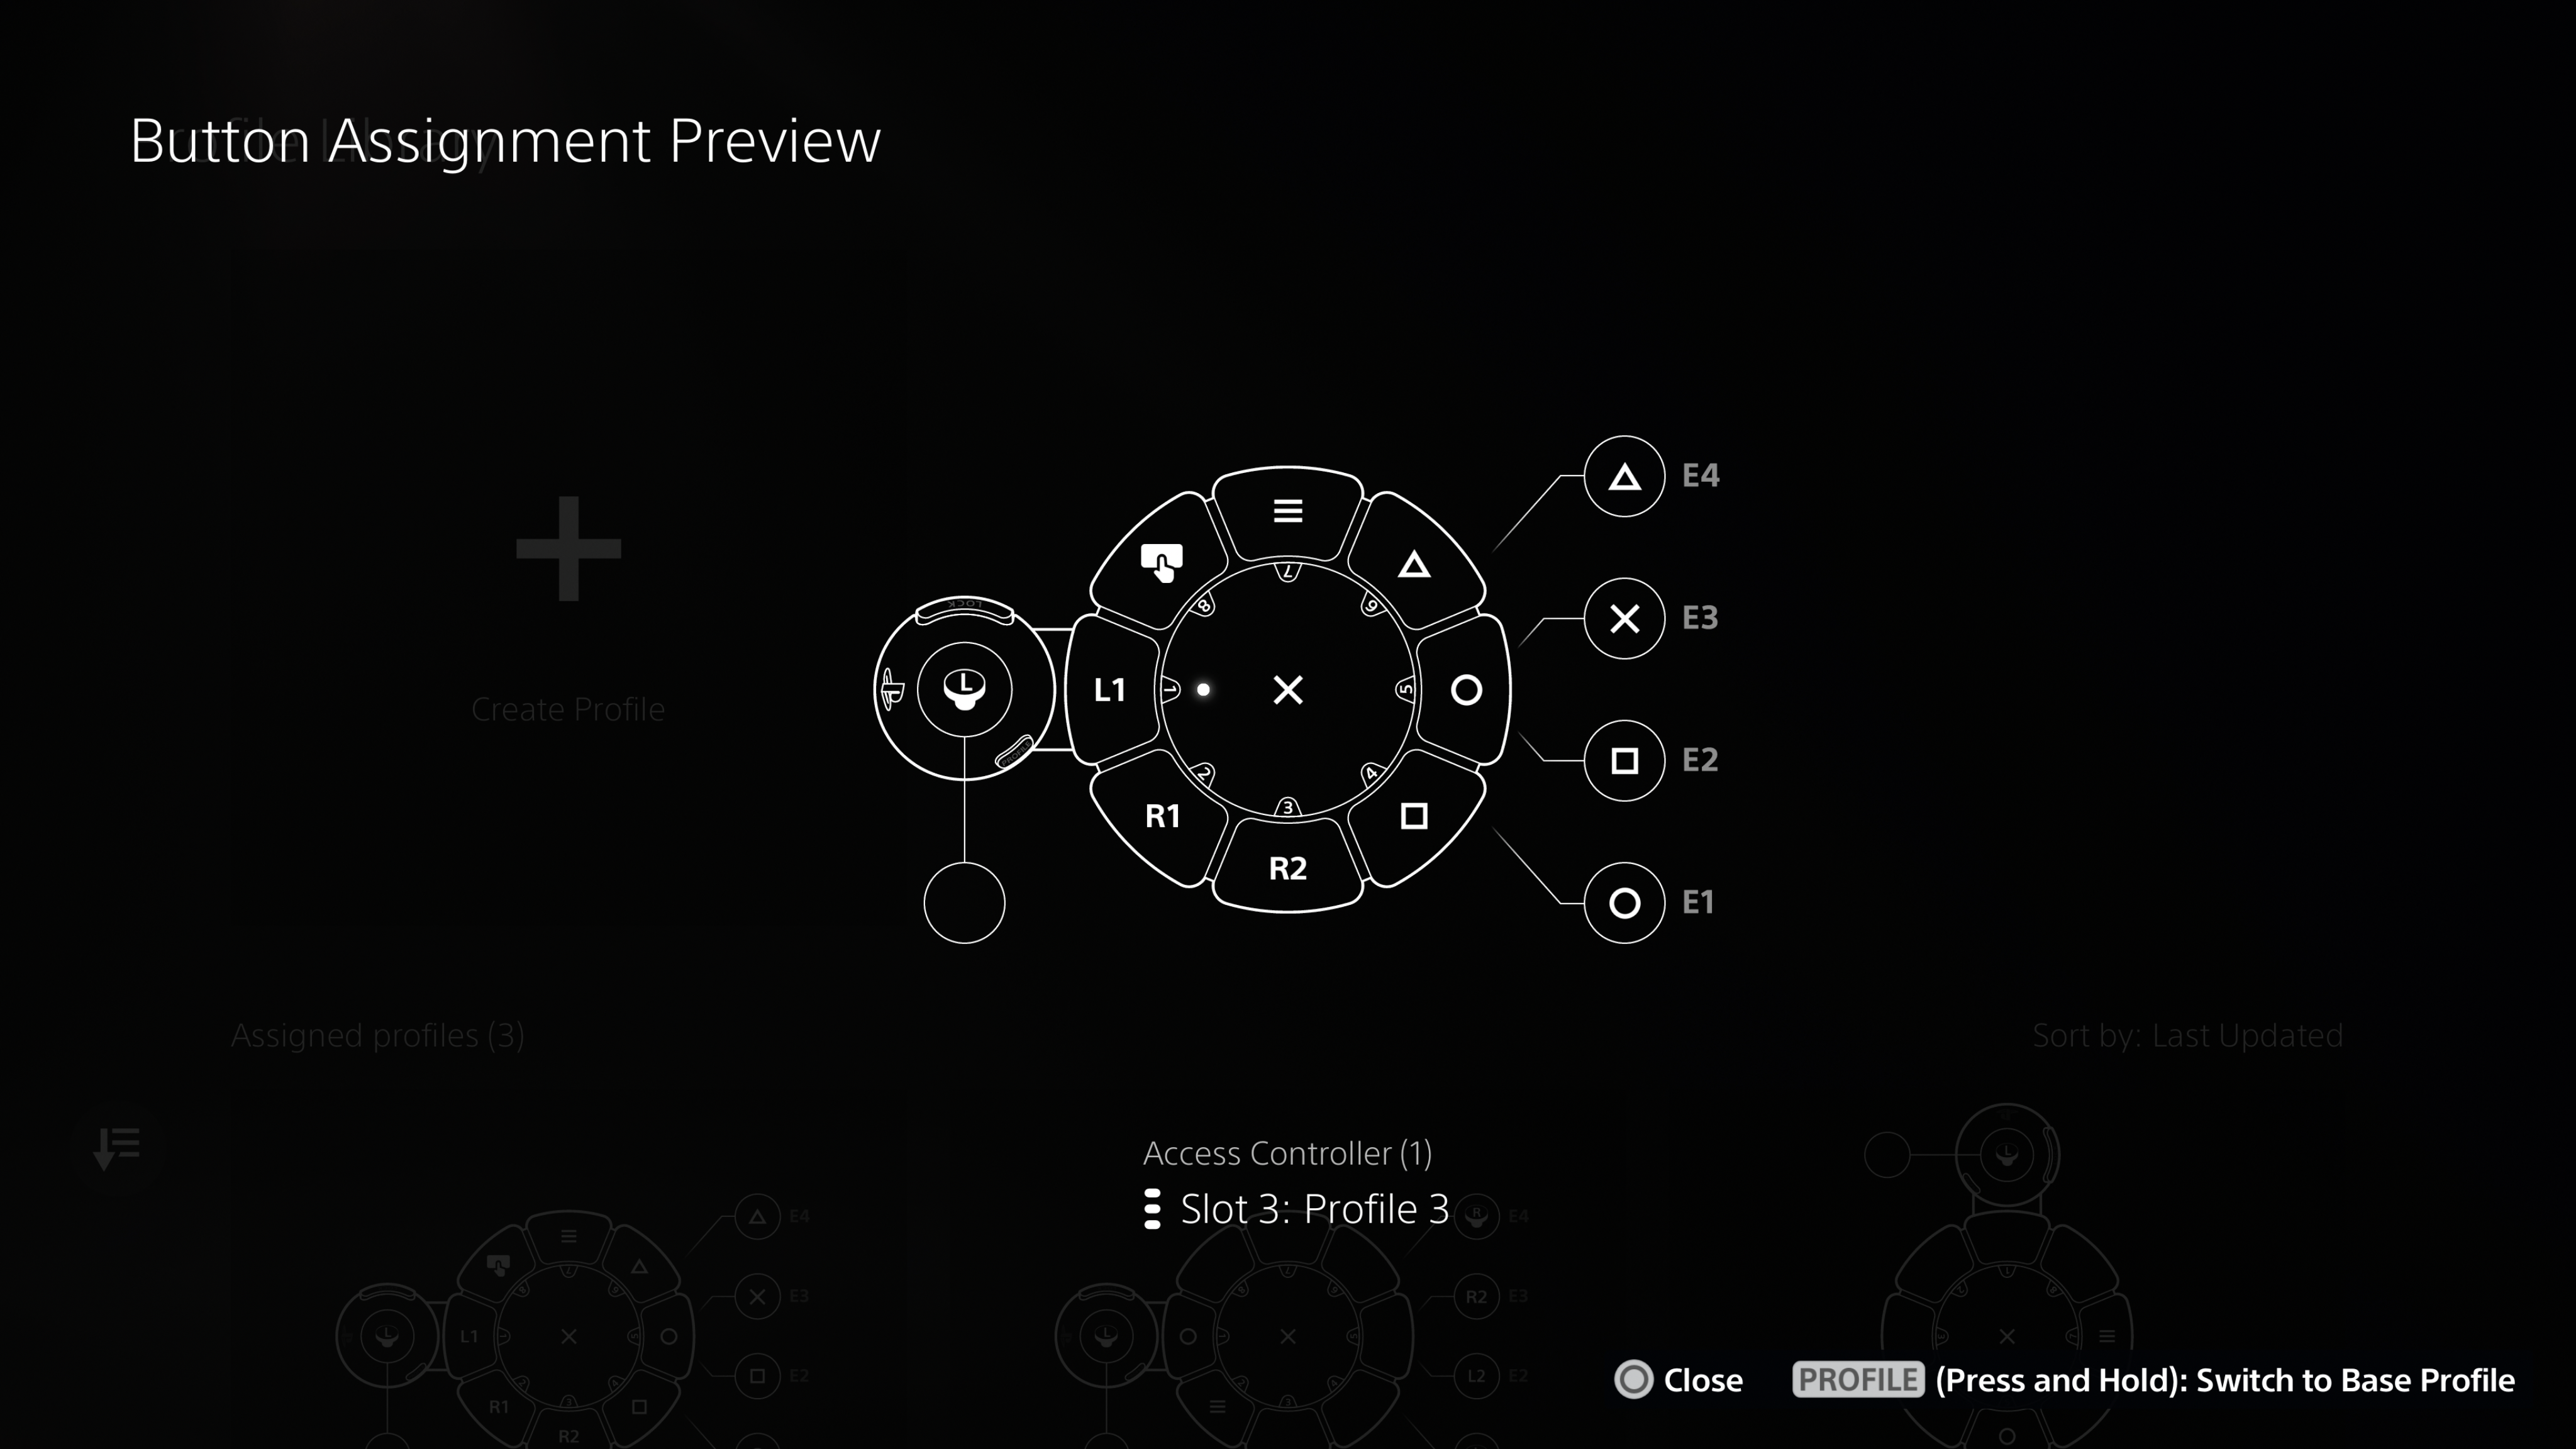
By default, the ‘J4’ USB slot is programmed to allow you to use a joystick for button inputs. For instance, you might move the connected joystick upwards, to press the Triangle button. To do this you will need some 3.5 mm mono patch leads and to map an Access controller’s E1-E4 slots to the inputs you want to use with the left, right, up and down directions of your joystick (example set-up in above photo). You can then move your joystick in these different directions to activate the different assigned button inputs. An example profile for using the face buttons, is shown in the image below:
We hope that this introduction to the HID Remapper v7 has been useful for getting an overview of the device. For more information, please visit the OneSwitch website and the HID Remapper GitHub pages.
For more information on controllers for PlayStation consoles, you can filter posts using both the ‘Equipment’ and ‘PlayStation’ categories on the GameAccess homepage or by clicking here: Equipment x PlayStation. For PS5 access information, please use the’PS5 Access‘ tag.